
LESSON 7 - FILMING, Audience, Setting
& SPACE USAGE
As we move along in our process, two things that we want to assess are who is our audience, and what is our setting. These can often be overlooked or underemphasized aspects of creating a choreography, or they can hold so much power that it freezes our creative process.
Audience, Setting & Filming
Setting
The setting for a performance can determine many things. If you have a specific event or venue planned for this choreography, this is something that you will be able to answer with more certainty. Those of you who have do not have a specific setting will be able to generally guide yourself, and also focus on adaptation should setting and audience change. Here are some questions to ask yourself when thinking about your setting for your performance:
Is this a live or recorded performance? In the time of COVID19, we cannot ignore all of the changes to our dance community and our opportunities to perform. New venues have arisen such as like live streaming online performances direct from our living rooms or a prerecorded online show. In the case of this series, we will all be recording our pieces and sharing them in the final show. So regardless of whether your final objective is an in-person performance or filming your piece, think about how each might require a different intention on your part.
Are you recording your choreography? Yes. The answer is yes, haha. Because you’ll be sharing it with everyone in this series, your friends and family! You could also be recording your piece to promote yourself, create online content, or have professional videography of your creation. Whatever the reasons are, think about they factor into how you decide to film your piece.
FILMING YOUR CHOREOGRAPHY
Things to think about when deciding how you want to film your hard work.
Do I potentially want to use this to promote myself professionally, get gigs, or use as high-quality online content?
If so, you want to probably hire someone to film and edit, or know someone who can do it for you.
What is most important to me in the filming of this piece?
Is it to have a momento of my hard work, something to show my progress and the final product of my process?
Is it to have a high-quality product of my choreography for possible other use?
Is something barebones fine for me? Or do I want the video to highlight my choreography and artistic vision?
Do I need help to film this choreography?
The answer is yes. In addition to having someone film and edit your video, you want to bring a friend or someone to assist you at the shoot. Someone who can move the tripod, grab your veil, make sure your hair is ok, help you with your makeup, make sure your underwear isn’t showing, hold your phone, take some behind-the-scenes videos or photos. Even if you film and edit the video yourself, bring a friend to help you with these things, to press play, you’ll be happy they’re there.
Do I want to hire someone to film or edit my choreography?
If you don’t know someone who can do this for you (and you don’t think it would ruin your relationship to get their help) and you’ve already been answering the previous questions in a way that leans towards hiring a videographer, you should just do it.
How to find someone to film and edit my choreography.
Ask around anyone you know that holds events in your area that have been filmed professionally or semiprofessionally.
Anyone in your area that has had a professional video produced, contact them and ask for references.
Check out the local dance scene on TikTok or Instagram, a lot of people are producing cool videos these days purely for promoting themselves online. Check out different dance styles in your area, look for who’s tagged as filming the video and follow the trail. (Especially check out Hip-hop, Heels, Contemporary dance).
Google and reach out to professionals that you find in your area. Don’t be afraid to ask them how to find what you’re looking for if they’re not it.
FILMING AT HOME OR OTHER ENVIRONMENTS
If you’re not going to get your piece professionally filmed, you’re editing it (or a friend), and you’re not leaving your home to film it, here are some things to think about. These things are important to think about regardless of being at home or elsewhere.
Lighting - You want to control the lighting and do a bunch of test runs.
Sound - Layer your music into your video after you shoot it, it will take out any random background noise, feet hitting the carpet, the beads of your costume, or whatever may be.
Background - Try and create a backdrop or background for your piece. Put away the dirty laundry and the cereal bowl, clear away stuff that doesn’t need to be in the frame. Add things that would be nice to look at, like fabric, pillows, plants, any props.
Check your frame - Make sure you’re not traveling out of frame, your hands aren’t getting caught off all the time, and that your entire body can be seen. If you can’t fit your entire body, see what looks bests by running test shots. This is also a responsibility for your Videoshoot Buddy to let you know what’s happening, if the frame looks good, if you fit and if they can see your underwear, lol.
Testing, Testing, 1, 2, 3 - When you’re setting up your space, your lighting, your frame, test it out by doing quick 15-second runs of your material and then make small adjustments until you find what works. (This is another reason having someone to help is very valuable). Plan on having at least 30 mins to an hour to get these settings right. It’s better to take this time, make it right and then look at your video later and wish you had spent ten minutes fixing this better.
Tripod or Gimbal - You need a tripod for your camera/phone, no matter what. If you want the camera to move, you need a gimbal. If you’re going to work with a gimbal, make sure the person using it is trained because it’s not very intuitive, there’s a learning curve.
Video Quality - Always record at the highest quality possible. Most of our smartphones are able to shoot very high quality video at this point, make sure you’re choosing the high quality your phone or camera offers, or at a minimum HD. You can always make the file smaller larger, you can’t increase quality after it’s shot.
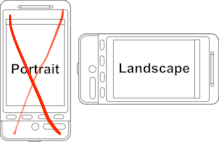
Frame - Always shoot your videos in Horizontal (Landscape mode) never vertical.
FILMING TIPS
Energy, Projection, Performance - Dancing for yourself at home is hard, or with no one present but a person standing behind a camera. There’s no energy and no one to feed off of. Even if you put your partner or your kid there to watch you, it’s hard to build up the performance energy and enthusiasm that you would in a live performance. BUT that doesn’t matter. Pay a lot of attention to Lesson 7, Lesson 8 & Lesson 9 in this series when thinking about how you’re going to perform your piece and where. Practice who you will engage and interact with the camera in order to communicate your message and how the videography affects the communication of your message. (This is not something to leave until shooting day to figure out)
The Camera - Practice playing towards the camera and looking into the camera. Refer to the concepts described later in the series about eye contact and engagement. You want to practice this before you film, and you want to have some strategy about when you’re connecting with the camera and when you’re not. Energy is not felt nearly as intensely in a recording as live, so you have to compensate for that and be prepared.
IN-PERSON VENUES
What type of venue is it? A theater, an Arabic nightclub, restaurant, corporate gig, hotel ballroom, Ren Faire, private party, all of these events can help you shape your piece by knowing your audience and knowing your setting. If you're in a theater you will need to use the space differently than an Arabic Nightclub or hotel ballroom.
How big is your performance space/venue and what shape is it? Often we mentally assume how much space we will have, and plan our choreographies to be directed towards a front and center audience, but often we're also given performance opportunities with the audience all around us or from varying angles. Plan your choreography to give all of your audience attention, and how might you change this choreography for a different venue size and shape. Another common situation is over or underestimation of the size of space. Be prepared to adapt your choreography without compromising the success of your performance! And if you have a small practice space and a big venue, rent some studio time in the weeks before your performance to make sure you’re able to adjust to the reality of your setting. If it’s the opposite, mark the size of your stage and put barriers like shoes and pillows on the floor so you can’t go beyond it.
Any potential floor difficulties? We're not always so lucky to have a dance floor sprung stage for our performances. Does your venue require shoes? How will that change your performance? Think about the surfaces you'll be performing on before you arrive and while working through your choreography. A theater stage, a stage put up in a hotel ballroom, a carpeted room, a backyard... these are all very different situations and may call for a change in footwear and in movement selection.
How far are you from your public? If you have the majority of your public at a close distance, they can see little nuances, if some of them are over a hundred feet away or more, they will lose a lot of that. Always play towards the middle of the "house", big enough for the people in the back to get a sense of what you're doing, but not so exaggerated that the people in the front row feel like it's overwhelming. How will a change in distance from your audience change your movement execution?
What type of lighting are you provided? Lighting can really help set the mood, and your audience will be sorely disappointed if you don't take advantage of it. Making sure you're in good lighting and in a good vantage point for your audience to capture your performance is important. Assess where the good lighting is and make use of it. There's nothing worse than getting back your video and realizing that if you just would have moved your choreo 5 ft forward that the entire thing would have been captured beautifully, and now you have shadow dancing instead.
Audience
Audience can be an extremely important aspect of your performance. Not only can it affect you in the moment of performing but it can affect your choreographing process as well. Many of us envision our choreography being performed in front of people that are important to us, let them be peers, family, friends, mentors, other artists, or judges. Some of this can be a negative or positive reaction. Audiences can be intimidating. As an artist and a performer you have to walk out on stage and put forth your work and by doing such you leave yourself vulnerable to criticism and critique, as well as positive reception and love. Most people are more affected by the fear of criticisms, fearing what people will say or how they will be perceived by others. It is important to assess who exactly will be your audience and how that might affect your choreography-making process or performance like, “it'll never be good enough for so and so”, or “this choreo is boring”. How it might affect your choreography itself, “It's a corporate gig so I won't do a random culture reference”. And how it will affect you while you're performing, “I'm so nervous because my idol is here and I want them to love me”. Or, like we’ve been discussing, what happens when there’s no audience, no one to fear, no one to love you, no one to receive your energy, but you still have to perform…
What type of event is it? Is it a festival stage performance, corporate gig, gala show, birthday party? This could greatly change your content. In a corporate gig and with many general public performances, entertainment is the main or focal priority. Within the dance community, artistry is given a much higher weight of importance. How might you change your performance if it was geared towards a corporate gig, or a wedding, or in front of your dance idol?
How many people are in the audience? If you have a small audience you can make a connection with almost everyone and don't have to push your energy as far. If you're in a theater you have to push it much farther and don't have the advantage of a direct connection with many audience members, if anyone. How are you going to spread that energy around?
What type of crowd is it? This goes hand in hand with what type of event is it. I change my performance style greatly depending on who I am performing for. Even within a belly dance community audience, some styles do not translate to specific groups, countries, cultures. So, understand your audience and how to translate your message to them or adapt it for better audience enjoyment.
Of what importance are the expectations of the audience? It is good for you to realize the pressure that you put on yourself to please the audience. Is that pressure high, low? Does it matter at all? To what extent are you performing for yourself and to what extent are you performing to share with others?
Is there anyone of specific importance in the audience? How might that affect you? From time to time there are bound to be people in the audience that you want to impress, that you want to give you good feedback, that you want to perform your heart out for. Or are there people in the audience that we’re intimidated by, we have a bad relationship with, or generate negativity in us? Think about how this is affecting your performance and your choreography process. We can be very negative on ourselves, never accepting of what we create because we feel it will never be good enough for these people. How will you combat these feelings, most of which are unfounded and only make our process harder?
FOCAL POINTS & EYE CONTACT
It’s important to not look blindly or randomly off into the audience, down at your feet, or up at the sky. Think about where you’re directing your energy and what it communicates. We will discuss this further in a future lesson, but for now, I want you to start thinking about creating focal points for your performance. Thinking about where you’re looking when you’re doing certain combinations, and when you’re going to create direct eye contact with the audience, and where. We will start to explore this in the Movement Application Video.
Optional Activity 1- Focal Points & Eye Contact
If you haven’t already, start thinking about facial direction and eye contact as another layer to your movement. Think about your choreography up to this point, and think about where you want your face to be directed, and when and where you’re creating eye contact. Film yourself practice these sections and see what it communicates. Make modifications and experiment with more direct or more evasive facial positions and eye contact.
Optional Activity 2 - Plan and Practice Eye Contact & Facial Expressions
This may seem odd, but it will help you visualize and control the application of eye contact and facial expressions. Take all of the movement out of your choreography, except foot patterns, and body positions (so basically, no arms, no hip work, no shimmy, no nothing except traveling and moving your body to face different directions). Now, run your choreography with only your traveling patterns, your body directions and your facial expressions and your eye contact. Take notice of where you look, where you want to look, when you’re making eye contact in certain plans. Create a plan for this layer of activity. Then slowly add it on top of your combos until it’s on top of your entire piece. Videotape this process from the first round, and make some changes based on what you see. Then examine how it’s working with the actually movements of your choreography and adjust.
Using space wisely
After you have assessed what your space looks like, who will be there, and any potential challenges, you now need to decide the wisest way to capitalize on the space you have with your specific choreography in mind.
Dividing Your Space
Imagine the grid below combined of the letters A, B, C, D, E, F, G, H, I is your performance space. The F,B,G represented the downstage space (edge of the stage closest to your audience), and the H, E, I represent the upstage space (back of the stage, farthest from the audience). A represents the center of your performance space, and C & D are the sides and outer middle sections.
----Audience----
-F---B---G-
-C---A---D-
-H---E---I-
----Back Stage----
A - This is your home, this is the most powerful position on the stage, it's also the most comfortable position on stage. You want to dominate this space. Dancers can tend to overuse this space, and most choreographies all return to this space after traveling. It's a very important area, but overuse is harmful because your absence in other areas will be noticed. You can spend all of your time in this area and because it's the most centric, powerful and comfortable space it won't be off-putting to your audience, but your lack of use of the other spaces will be felt.
B - The next most powerful position is the downstage center (B). You are the closest you can be to the audience at this time and it demands attention. It can be seen as more aggressive (or confident) to move into this space, and a lot of dancers don't always give thought to its capacity. It can be very powerful to move to the front center of the stage, grab the audience's attention and then perform a pivotal section in your choreography. But if you've constantly entered into that space previously, you will wear out its usefulness and it will not be as impactful. It does tend to be more commonly used because we tend to be more comfortable traveling forward than backward.
C & D - These sections are probably the next most commonly used as they are next to A and are regularly used for side travel combinations. Many dancers move right or left, but tend to move back to center (A) rather quickly. This is another display of A being a comfort zone that dancers struggle to move out of. But, staying in the C & D space can be worthwhile because its gives a visual angle change for your audience and definitely feels different than center stage.
E - This space is mostly engaged for combinations that move backwards, which in younger dancers they tend to lack these combos because they are not comfortable traveling backwards and its less common in American Cab style. Younger dancers do tend to use this space when they have not yet become comfortable with A as their homebase. Sometimes timid and shy dancers will stay further back on the stage avoiding the audience within this area. E is still centric, which feels natural, but it puts more distance between themselves and the audience. This space can also be used to give an aloof or distanced feeling, or to allow a really long travel to the front of the stage.
F & G - Stage corners are usually used when traveling to the front rim or to try and connect with the side audiences. Spending too much time here can be a choreography feel lopsided or awkward. It's not a natural position on stage to spend a lot of time in, but can be well used for connecting and traveling, trying to engage with the sides of the audience and give a break to the middle use of space. Avoid spending too much time on the front edge of the stage, it will feel as though you accidently put together your choreography this way and what could have been conveyed in the middle was then conveyed in the front section. If you move everything to the front section, you can no longer move forward, all your travel as to be completely profile, or backwards, and you are left with a ton of unused space behind you.
H & I - These are the least used spaces on the stage, usually entered for entrance and exits to the performance space. It is a potential floor path area, can give a “far away”, alouf effect. But, it can create a loss of connection if not used correctly. Because they're so far away from the center and the audience, people tend to not use these spaces because they're more difficult to incorporate into their pieces. Don’t get caught in these spaces as you are transitioning on to the stage in the entrance of your piece.
Common Uses of Space
Entering the Stage & Marking Your Territory! - Especially in Mejance songs, or entance pieces, the first part of the choreo is commonly used to circle the stage, acknowledge the audience, and essentially mark your new found territory. Before you break into the meat of your choreography, try and use as much space as possible, mark your territory largely, if it make sense musically, and take your time as the music allows. It doesn't matter who else has been on the stage before you, this is now YOUR space, own it!
Traveling Ranges - Think about the space around you, in front, behind, sides. You can travel in small space around you, you can make big circles and shapes on the stage. Don’t think that all traveling is created equal. I tend to divide the ranges into Personal Space, Arms Width, Medium Size Circle, Large Circle. Traveling on a circular path that revolves around the center point at an arms length distance will feel quite different then if I use a Large circle and hit the F, G, H and I corners with my circle. You can do traveling moves without actually covering much ground, or you can cover a lot. Be mindful.
Don’t Get Caught In the Front - Set your piece so that it can use the front line, F, B, G, without abusing it. Less experienced dancers can get caught up in the front row, or dancers who haven’t practice the traveling in their pieces full out or in adequate space, won’t realize their choreography is constantly moving forward.
Common Shapes - We all pretty much use this concept, using a traveling move or combination, and create a circle around the A center space that may or may not come into contact with the other areas. If you can make this circle bigger and touch other areas it will have a better spacial effect. This is also a over commonly move, beware of constantly traveling in a circle and or direct lines on stage.
To the Left, to the Left... and Then Back to Center... - Probably the most common floor pattern and stage space usage is starting in the center and moving to the side C or D (right or left) and then settling comfortably back into center (A). If you're going to do this, make it worth your while, don't travel 1ft when you could travel 5ft. Use your traveling to display differences of movement and feeling, don’t just travel to travel.
From A - B - Approaching the audience can be intimidating to a dancer and powerful to the audience. Advancing forward is a sign of confidence and control, but if you overuse it it can turn meaningless. A dancer who is constantly on the edge of the stage limits herself and has nowhere to go but back. A dancer that constantly goes from A - B - A - B - A - B loses the power of the approach and departure. As well as the the specialness of being the closest possible to the whole audience at one time, and how that can affect and promote the conveyance of your message.
3 CIRCLES OF SPACE
I like to divide the space around me into 3 circles, the Personal Circle, Arms Reach Circle and Outer Circle.
When I think about if I want to use space or travel, I ask myself, what circle am I working in?
Personal Circle - This circle is the space right round your immediate body, rotating in place. If you are working in the Personal Circle, you’re not actually moving, you’re dancing in place.
Arms Reach Circle - This circle is medium distance. If you open your arms and imagine that an invisible line encircles you with your fingertips reaching the edge of the circle. This gives you about 2-3 feet (More or less 1 meter) in any direction.
The Outer Circle - This is the circle that includes the space beyond my Arms Reach Circle. Touching more of the outer areas of my performance space.
This reference usually helps make decisions about what kind of travel or space use you want.
Which circle do you want to use? Now pick moves that make sense for that circle.
MOVEMENT APPLICATION VIDEO
Using Space, Modifications & Eye Contact
FINAL VIDEO SPECIFICATIONS
PERFORMANCE & INTRODUCTION VIDEOS ARE DUE MARCH 13TH!
PERFORMANCE VIDEO
Your video must be shot in horizontal/landscape mode, not portrait mode. See image below.
Please shoot your video in High Definition. If you’re shooting with a smart phone, this is decently easy to check and pretty standard at this point. Try and shoot in the high possible quality, 4K is preferred if possible.
Make sure you use a tripod or gimbal to shoot all videos.
Video Due date is MARCH 13th. If you have your videos early, please send them in!
INTRODUCTION VIDEO
I would like everyone to introduce their videos so the audience can have an introduction to the concept for the piece, your process and experience in this series.
Video Specifications
Your introduction video must be shot in horizontal/landscape mode, not portrait mode. See image below.
Please shoot your video in High Definition. If you’re shooting with a smart phone, this is decently easy to check and pretty standard at this point. Try and shoot in the high possible quality, 4K is preferred if possible.
I would write out what you want to say so that you can practice it a little bit to the camera.
This video can be shot at another time, it does not need to be in costuming. Try and find somewhere with nice background (not too busy).
What to Say:
Introduce yourself, where you live, the song, the artist. (Please mention)
What was your focus for this series? Did that change at all? (Optional)
Did you have any challenges? Break throughs? (Optional)
What is your message for this piece? (Please Mention)
Please keep this to 60-90 seconds max.
FEEDBACK, CRITIQUE
& CONSTRUCTIVE CRITICISM
Remember to apply the theory from this lesson as well as from all of the other lessons.
Each Feedback video compounds ideas from the previous lessons, so keep that in mind.
QUESTIONS
What does the use of space in this video communicate?
What does the engagement with the audience communicate?
What’s missing from this dancers use of space and audience connection?
LESSON 7 ASSIGNMENTS
DUE ON TUES/WEDS 17 & 18 OF JAN
These to be turned into amandaroseonline@gmail.com
Filming Concept - Submit a paragraph describing your plans so far for filming your choreography.
Video Specs - Review the video specifications for the video submission for the final show.
Who will you be shooting your video? What kind of camera will you use?
Please shoot in HD (4K is preferred and is a possibility on all recent Android and Apple phones)
YOU MUST SHOOT in landscape mode (horizontal), see image.
Video Submission - Send a video of all of the sections of the choreography that you’ve developed. You can treat it like a “Talking Walk Through" and walk and talk through the sections you do not have, and then perform the choreography in the sections that you do have. You can also submit different sections in multiple videos, but not multiple videos of the same section.
Combo of Section for Group Critique In Live Group Session - Prepare to share a section of your current piece that you are working on and have hit a roadblock or want suggestions about. Prepare the video to be edited to include only the part of the choreography you want to share. Explain to your fellow participants what your overall Message is, what your focus is for this section, and what you want help with? We will be sharing in small groups in the next live session.
Feedback, Critique & Constructive Criticism - Answer the questions and submit.